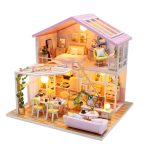
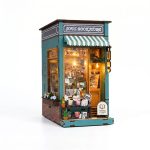
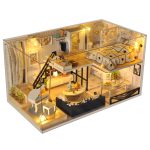
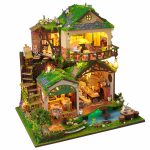




Book Nook Diorama: Guide, Ideas, and Kit Recommendations
A book nook diorama is a miniature scene designed to slot between books on a shelf, viewed from the side to create the illusion of a world behind the bookcase. If you’re deciding which kit to buy, this guide covers what the format actually is, how to match a kit to your skill level and shelf space, theme ideas to get you started, and practical tips from the first cut to the final LED test.
What Is a Book Nook Diorama?
The term gets used loosely, so let me draw the line. A book nook is the general format—a vertical insert that fills the gap between books on a shelf. A book nook diorama goes further. It emphasizes scene-building: layered depth, foreground objects, midground structures, and a background that draws the eye inward. A standard book nook insert might be a simple archway. A diorama might be a miniature bookstore with shelved books, a reading chair, and an LED simulating lamplight. The difference is narrative—one is a view, the other is a place.
The constraints are what make this format interesting. Typical shelf depth runs 4 to 8 inches. Every millimeter of perceived depth has to be designed, not found. The perspective lines, the scale of a doorway relative to a chair, the angle of a roofline—each is a choice about how to compress three dimensions into a narrow slot. Book nook kits are harder to design than full house kits of the same size for exactly this reason: you’re working within the distance between someone’s paperbacks, not free-standing space.
To learn more about book nook kits and how they work, that page covers sizing, shelf fit, and what comes in the box.
How to Choose the Right Book Nook Diorama Kit
When I’m evaluating a miniature kit book nook—ours or anyone else’s—I check five things in this order.
- Difficulty level. Nookcraft kits are rated either Intermediate (~4–7 hours) or Advanced (~8–15 hours). We don’t sell beginner-level kits. The ones that claim to be beginner-friendly often skip steps in the instructions and leave you guessing at step 23. We’d rather tell you what you’re getting into. If you’re planning a build that pushes into 300+ pieces, our miniature diorama kit guide covers advanced techniques for working through longer assemblies.
- Material. Laser-cut basswood with ±0.1mm precision is the baseline for a kit that assembles cleanly. The joints fit. The wood grain is visible and takes paint if you want to customize. Cheaper kits use MDF board—heavier, no visible grain, and the edges chip during assembly. If the finished piece is going on your shelf for years, the material matters.
- Lighting. Every Nookcraft kit includes an LED string with wire and battery compartment. Batteries are not included—this trips up more people than you’d expect. One buyer emailed to say her LED stopped working on day three. She’d followed every step. When I traced it back, glue had seeped into the copper wire joint during final assembly. That step now has a warning box in every manual: keep glue away from wire ends.
- Piece count. This is your complexity indicator. A kit with 150–200 pieces is the lower end of intermediate—manageable in one long evening. A kit with 350–500 pieces will need patience and two afternoons. More pieces mean more detail, but also more opportunities to misplace a part the size of your fingernail.
- Realistic assembly time. We track this across test builds. Declared times on any kit are usually the fastest a competent builder could go if nothing went wrong. Add 30–40% and plan for two sessions. The second session is almost always better—the glue has set, you’re not rushing, and you can actually enjoy the final detailing steps.
One more thing: measure your shelf. Width and depth. The most common mistake buyers make is assuming their shelf is standard. It probably is. Check anyway.
Inspiration: Book Nook Diorama Themes and Ideas
A book nook diorama says something about what you read, or what kind of place you want to look at every day. Here are themes that work well in the format.
- For the book collector: A miniature bookstore or library scene. Stacked shelves, a reading desk, a ladder. These play directly to the context—they sit between your actual books and suggest there’s a whole shop in there. The miniature bookstore kit collection has variations from Victorian library to modern indie bookshop.
- For the nature-inclined: Woodland paths, garden sheds, greenhouse scenes. These use more organic shapes and benefit from warm LED glow simulating dappled light or a window at dusk.
- For the fantasy reader: Brick alleyways with lampposts, hidden doors, staircases that go somewhere impossible. The depth illusion works hardest here—the scene needs to feel like it keeps going past what you can see.
- For the cozy-at-home type: Kitchen dioramas, coffee shop corners, reading nooks within reading nooks. Cottagecore aesthetics fit naturally—natural wood, small potted plants, soft lighting.
When choosing a theme, think about what’s already on your shelf. A woodland scene next to a collection of nature essays. A fantasy alley next to a row of Tolkien. The diorama becomes part of the shelf’s visual language, not a standalone decoration.
Our Book Nook Miniature House Kit Recommendations
Rather than ranking kits by number, here’s how I’d match a book nook miniature house kit to where you are.
If this is your first diorama build: Start with something in the 150–250 piece range. Expect 5–7 hours total, best split across two sessions—one evening for walls, floor, and main structure; a second session for furniture, details, and lighting. The scene should have a clear focal point: a table, a doorway, a window. Something your eye knows to land on.
If you’ve built before and want more detail: Look at kits with 300+ laser-cut pieces. These take 8–12 hours and reward patience. You’ll encounter more intricate steps—layered roof tiles, threaded wiring through small anchor holes, miniature furniture assembly. All Nookcraft kits include full-color English photo instructions with honest difficulty guidance, and every kit ships with a 30-day returns policy plus free replacement parts for missing or damaged pieces.
Regardless of level: The LED string is included in every kit. The instructions are English-first, photo-based, and tested step by step with real builders. We don’t rate anything as “easy” because that word doesn’t tell you anything. Instead, we tell you which steps most people find tricky and how to handle them.
Tips for Building Your First Miniature House Book Nook
These are the things I tell people who email us before they start.
Workspace. Flat surface, good overhead lighting, a tray or shallow box for small parts. I use a desk with the left side cleared and the middle reserved for assembly. This sounds obvious until you’re on step 47 and three pieces have slid off the edge of a cluttered table.
Read first, build second. Our manuals start with preparation steps—scanning the instruction booklet before you open any bags. You don’t need to memorize it, but knowing that the roof===HTML_START===
article class=”nookcraft-article”>
Book Nook Diorama: Guide, Ideas, and Kit Recommendations
A book nook diorama is a miniature scene designed to slot between books on a shelf, viewed from the side to create the illusion of a world behind the bookcase. If you’re deciding which kit to buy, this guide covers what the format actually is, how to match a kit to your skill level and shelf space, theme ideas to get you started, and practical tips from the first cut to the final LED test.
What Is a Book Nook Diorama?
The term gets used loosely, so let me draw the line. A book nook is the general format—a vertical insert that fills the gap between books on a shelf. A book nook diorama goes further. It emphasizes scene-building: layered depth, foreground objects, midground structures, and a background that draws the eye inward. A standard book nook insert might be a simple archway. A diorama might be a miniature bookstore with shelved books, a reading chair, and an LED simulating lamplight. The difference is narrative—one is a view, the other is a place.
The constraints are what make this format interesting. Typical shelf depth runs 4 to 8 inches. Every millimeter of perceived depth has to be designed, not found. The perspective lines, the scale of a doorway relative to a chair, the angle of a roofline—each is a choice about how to compress three dimensions into a narrow slot. Book nook kits are harder to design than full house kits of the same size for exactly this reason: you’re working within the distance between someone’s paperbacks, not free-standing space.
To learn more about book nook kits and how they work, that page covers sizing, shelf fit, and what comes in the box.
How to Choose the Right Book Nook Diorama Kit
When I’m evaluating a miniature kit book nook—ours or anyone else’s—I check five things in this order.
- Difficulty level. Nookcraft kits are rated either Intermediate (~4–7 hours) or Advanced (~8–15 hours). We don’t sell beginner-level kits. The ones that claim to be beginner-friendly often skip steps in the instructions and leave you guessing at step 23. We’d rather tell you what you’re getting into. If you’re planning a build that pushes into 300+ pieces, our miniature diorama kit guide covers advanced techniques for working through longer assemblies.
- Material. Laser-cut basswood with ±0.1mm precision is the baseline for a kit that assembles cleanly. The joints fit. The wood grain is visible and takes paint if you want to customize. Cheaper kits use MDF board—heavier, no visible grain, and the edges chip during assembly. If the finished piece is going on your shelf for years, the material matters.
- Lighting. Every Nookcraft kit includes an LED string with wire and battery compartment. Batteries are not included—this trips up more people than you’d expect. One buyer emailed to say her LED stopped working on day three. She’d followed every step. When I traced it back, glue had seeped into the copper wire joint during final assembly. That step now has a warning box in every manual: keep glue away from wire ends.
- Piece count. This is your complexity indicator. A kit with 150–200 pieces is the lower end of intermediate—manageable in one long evening. A kit with 350–500 pieces will need patience and two afternoons. More pieces mean more detail, but also more opportunities to misplace a part the size of your fingernail.
- Realistic assembly time. We track this across test builds. Declared times on any kit are usually the fastest a competent builder could go if nothing went wrong. Add 30–40% and plan for two sessions. The second session is almost always better—the glue has set, you’re not rushing, and you can actually enjoy the final detailing steps.
One more thing: measure your shelf. Width and depth. The most common mistake buyers make is assuming their shelf is standard. It probably is. Check anyway.
Inspiration: Book Nook Diorama Themes and Ideas
A book nook diorama says something about what you read, or what kind of place you want to look at every day. Here are themes that work well in the format.
- For the book collector: A miniature bookstore or library scene. Stacked shelves, a reading desk, a ladder. These play directly to the context—they sit between your actual books and suggest there’s a whole shop in there. The miniature bookstore kit collection has variations from Victorian library to modern indie bookshop.
- For the nature-inclined: Woodland paths, garden sheds, greenhouse scenes. These use more organic shapes and benefit from warm LED glow simulating dappled light or a window at dusk.
- For the fantasy reader: Brick alleyways with lampposts, hidden doors, staircases that go somewhere impossible. The depth illusion works hardest here—the scene needs to feel like it keeps going past what you can see.
- For the cozy-at-home type: Kitchen dioramas, coffee shop corners, reading nooks within reading nooks. Cottagecore aesthetics fit naturally—natural wood, small potted plants, soft lighting.
When choosing a theme, think about what’s already on your shelf. A woodland scene next to a collection of nature essays. A fantasy alley next to a row of Tolkien. The diorama becomes part of the shelf’s visual language, not a standalone decoration.
Our Book Nook Miniature House Kit Recommendations
Rather than ranking kits by number, here’s how I’d match a book nook miniature house kit to where you are.
If this is your first diorama build: Start with something in the 150–250 piece range. Expect 5–7 hours total, best split across two sessions—one evening for walls, floor, and main structure; a second session for furniture, details, and lighting. The scene should have a clear focal point: a table, a doorway, a window. Something your eye knows to land on.
If you’ve built before and want more detail: Look at kits with 300+ laser-cut pieces. These take 8–12 hours and reward patience. You’ll encounter more intricate steps—layered roof tiles, threaded wiring through small anchor holes, miniature furniture assembly. All Nookcraft kits include full-color English photo instructions with honest difficulty guidance, and every kit ships with a 30-day returns policy plus free replacement parts for missing or damaged pieces.
Regardless of level: The LED string is included in every kit. The instructions are English-first, photo-based, and tested step by step with real builders. We don’t rate anything as “easy” because that word doesn’t tell you anything. Instead, we tell you which steps most people find tricky and how to handle them.
Tips for Building Your First Miniature House Book Nook
These are the things I tell people who email us before they start.
Workspace. Flat surface, good overhead lighting, a tray or shallow box for small parts. I use a desk with the left side cleared and the middle reserved for assembly. This sounds obvious until you’re on step 47 and three pieces have slid off the edge of a cluttered table.
Read first, build second. Our manuals start with preparation steps—scanning the instruction booklet before you open any bags. You don’t need to memorize it, but knowing that the roof section comes before the furniture section helps you pace yourself. Most instruction manuals start at step 1. Ours start at step 3, because steps 1 and 2 are the preparation that nobody ever includes but everybody needs.
Common sticking points. We let three people who had never touched a miniature kit build the same model and tracked where they got stuck for more than ten minutes. It was the same two steps for all three: roof tile layering and threading the LED copper wire through the anchor holes. The instructions weren’t wrong—they were just written for someone who already knew what the finished piece was supposed to look like. We rewrote those sections with more callout arrows. When you get to a step with a warning box, slow down there.
Glue application. Super glue is usually not included in kits—have a bottle ready before you start. Apply sparingly. Too much glue seeps into joints, stains the wood, and can interfere with the LED wire. A single drop on the joining edge is enough for most basswood connections. If glue does get on the wire, wipe it immediately with a dry cloth before it sets.
The two-session rule. Split the build into two sessions. First session: structural assembly—walls, floor, roof framework. Let the glue cure overnight. Second session: furniture, decorative details, lighting installation, and final adjustments. The second session is where the scene starts to look like something, and you’ll have the patience to enjoy it because the pressure of “finishing tonight” is gone.
The one-minute test. After you finish, leave the room. Come back in one minute. If the finished piece still looks right from across the room, it’s ready for the shelf. If you’re already seeing the thing you should have fixed, fix it now. This sounds like a small thing. It has held up every kit we’ve released.
For the full selection across all skill levels, see our complete range of book nook kits.
Frequently Asked Questions
What’s the difference between a book nook and a book nook diorama?
A book nook is the general term for any decorative insert that fits between books on a shelf. A book nook diorama is a specific type that emphasizes scene-building—layered depth, foreground-to-background perspective, and a sense of narrative. Think of it this way: a book nook might be a decorative arch. A diorama is a miniature world you can look into and feel like you’re standing at the entrance of something.
How long does it realistically take to assemble a book nook diorama kit?
Declared times are usually the fastest a skilled builder could go without stopping. Add 30–40% for realistic planning. Intermediate kits run 4–7 hours total. Advanced kits run 8–15 hours. We recommend splitting the build across two sessions regardless of kit complexity—the first session for structure, the second for details and lighting.
Do I need to buy additional tools or materials like glue?
Super glue (cyanoacrylate) is not included in most kits—you’ll need to buy it separately. A pair of tweezers, a craft knife, and a small pair of scissors are also useful. The kit itself includes all the laser-cut wooden parts, LED string with wire, and printed instructions. Batteries are not included either—most kits use a CR2032 button cell or AA batteries depending on the model.
Are book nook dioramas suitable for beginners?
Our kits are rated Intermediate or Advanced. We don’t currently offer beginner-level kits. That said, if you’re willing to follow photo instructions carefully and give yourself time, an intermediate kit with 150–200 pieces is a reasonable first build. Start with a kit at the lower end of the piece count, follow the preparation steps, and expect a learning curve around steps 20–30 when you’re still calibrating how much glue to use and how the joints fit. The instructions are designed to walk you through it.
How do I maintain and display my finished book nook diorama?
Place it in a stable spot on the shelf where it won’t get bumped. Dust accumulates inside miniature scenes over time—a dust cover (sold separately) protects against this and keeps the LED wiring clean. If you don’t use a cover, a soft brush every few weeks removes surface dust. Avoid placing the kit in direct sunlight for extended periods, as this can fade the basswood and any painted surfaces over months.
Ready to build your own book nook diorama? Browse our diorama scene kits to find the right match for your shelf and skill level.