







After designing instruction manuals for over a dozen kits and watching first-time builders work through every step, one pattern becomes clear: most people don’t struggle because the kit is too hard. They struggle because no one told them what to expect before they opened the box.
This guide changes that. Whether you’ve never done anything like this before or you’ve tried another kit and gotten stuck, here’s exactly how to build a miniature house kit — from the moment you receive it to the moment it sits on your shelf.
What’s Actually Inside a Miniature House Kit (Before You Open Anything)
Most kits ship with three categories of components, and knowing what they are before you start will save you from that moment of staring at the contents thinking where do I even begin.
- Structural pieces — laser-cut basswood boards with pre-cut parts still attached. These form the walls, floors, roof panels, and furniture frames. Run your fingers along the edges: with a well-made kit, they should feel smooth. Rough edges or visible fuzz are signs of lower-quality cutting.
- Detail components — fabric swatches, paper sheets, acrylic panels, thin wire, and pre-printed decorative elements. These are what give the finished scene its texture and personality. Paper components are the most fragile; handle them last.
- Hardware — glue, a string of LED lights (usually with a battery box attached), and sometimes tweezers or a craft tool. If your kit includes LED lights already in the box, that matters: many kits sold elsewhere require you to source lighting separately.
Before you do anything else, scan every section of the instruction manual from start to finish. Not to memorize it — to know the shape of the whole build. What looks like chaos in the box becomes logical once you know where each phase ends.
Browse our miniature house kits →
The Tools You Need — and the One That Makes the Biggest Difference
Your kit includes glue. Here’s what else you’ll want nearby:
- Tweezers — not optional for any kit with pieces smaller than your thumbnail. An angled or offset pair is easier to control than straight ones. If your kit doesn’t include them, get a pair before you start. The difference between placing a 3mm paper window frame with your fingertips versus tweezers is not small.
- Craft glue or wood glue — the included glue is usually adequate, but if yours is fast-drying, have a slower-setting PVA nearby for steps where you need time to adjust positioning.
- A cutting mat or scrap board — for protecting your table when pressing pieces out.
- Good lighting — natural light from a window is best. If you’re working in the evening, a daylight-spectrum lamp makes it easier to see where pieces fit.
- Small binder clips or rubber bands — for holding glued pieces in place while they dry.
That’s the complete list. You don’t need specialty tools. What you need is patience — and tweezers.
Step 1 — Prepare Your Workspace Before You Touch a Single Piece
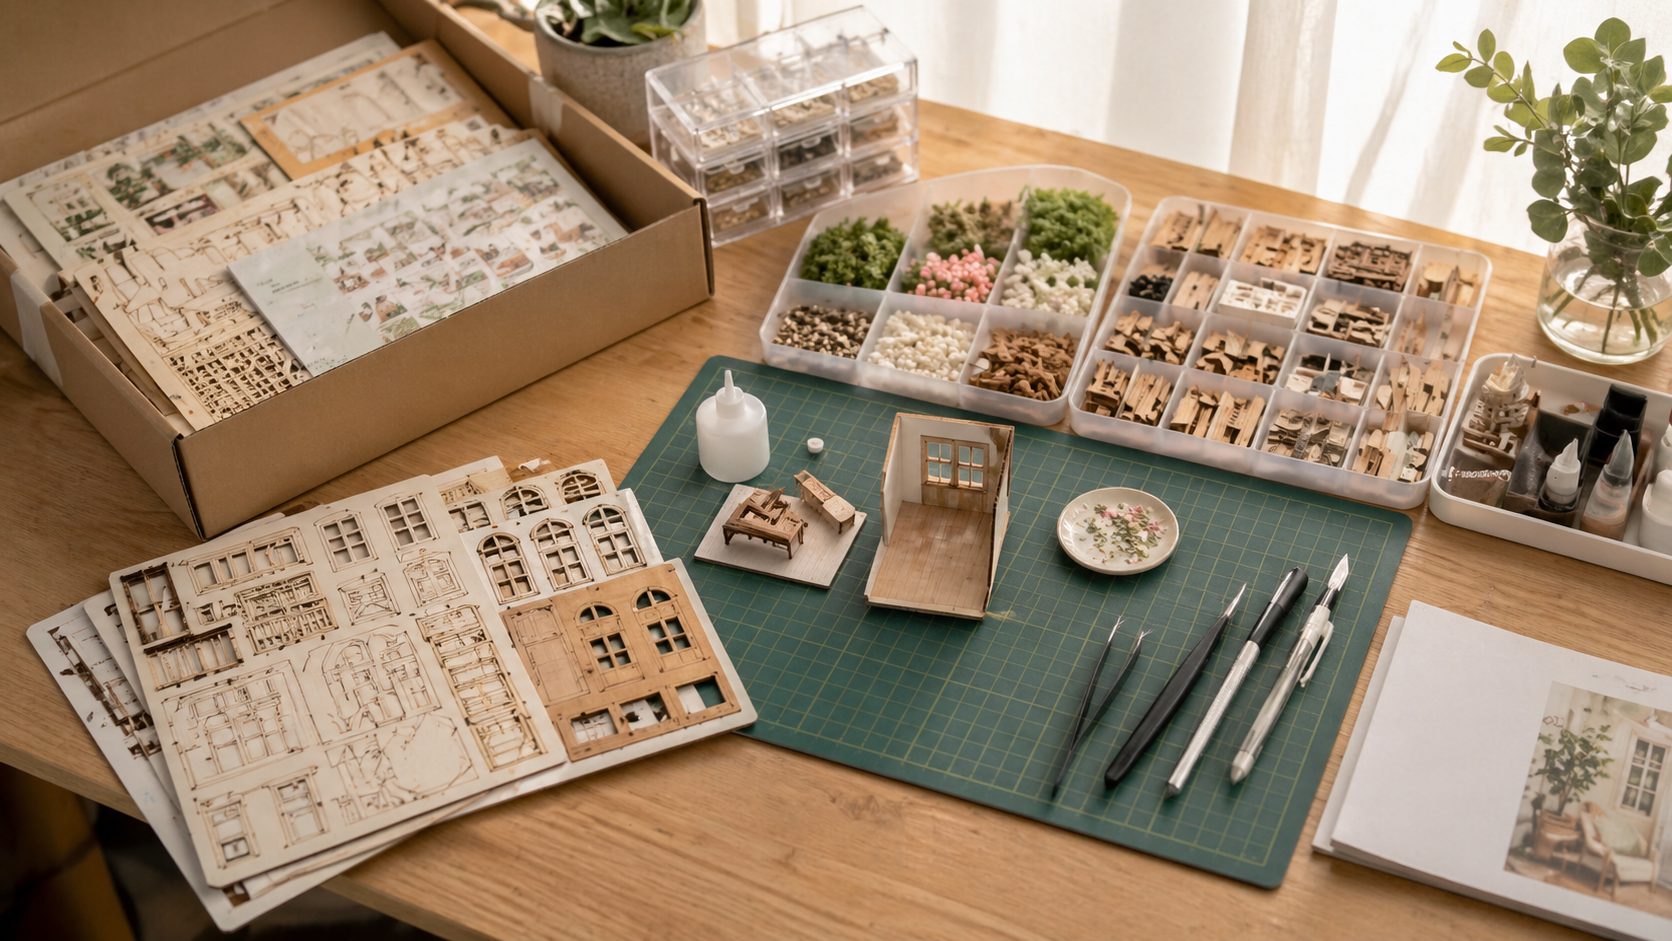
Most instruction manuals open with “Step 1: Remove piece A from the board.” That’s actually Step 3.
The real Step 1 is your workspace. Clear a flat surface — flat matters more than large. If your table wobbles even slightly, move to a different one. Small parts placed on an unstable surface shift, and a wall that dries at a 2-degree angle will cause problems three hours later when you’re trying to attach the roof.
Leave the center of your space empty. That’s your active build zone. Put the instruction manual to one side, your tools to the other. Keep a small container nearby for pieces you’ve punched out but aren’t using yet.
Step 2 is reading ahead. Before you touch a piece, read three steps forward. Some sequences have a “do this before you close that in” moment that isn’t obvious unless you’re looking for it.
Browse beginner-friendly kits with clear English instructions →
Step 2 — Punch Out and Sort Your Pieces (Don’t Skip This)
Every basswood board has a logical front and back. When punching out pieces, press from the back toward the front — this reduces the chance of splitting along the grain.
Go slowly on small pieces. The laser cut creates a slight char line on the surface; this is normal and sands off easily if needed. Use a craft knife only if a piece won’t release with gentle pressure; forcing it risks snapping.
Once a piece is out, don’t just set it loose. Sort as you go:
- By step number if the manual groups them this way
- By size if multiple similar shapes exist — two pieces that look identical at a glance are often not. One might be 18mm wide, the other 16mm. Your instruction photos will show the difference; your hands need to confirm it before you glue.
One of the most common reasons builds go wrong has nothing to do with technique: it’s gluing the wrong piece because two similar-looking parts didn’t get sorted and checked.
Step 3 — Build the Base Structure First
Almost every miniature house kit follows the same structural logic: floor → walls → roof. Work in this order even if curiosity pulls you toward the decorative details first.
The floor panel is your foundation and your alignment reference. If it’s level and square, everything attached to it will be too.
When attaching walls:
- Apply glue to one surface — not both. A thin, even layer.
- Press the pieces together and hold for 30 seconds minimum. Not a quick press and release. Thirty seconds.
- Use a binder clip or piece of tape to hold the joint while the glue sets. Give it 5 minutes before handling.
The most important thing about glue at this stage: don’t rush it. The instructions will tell you when it’s safe to move on. If yours don’t, a 10-minute wait between major structural joins is a reasonable rule.
Step 4 — How to Install the LED Lights (The Step Most Guides Skip)
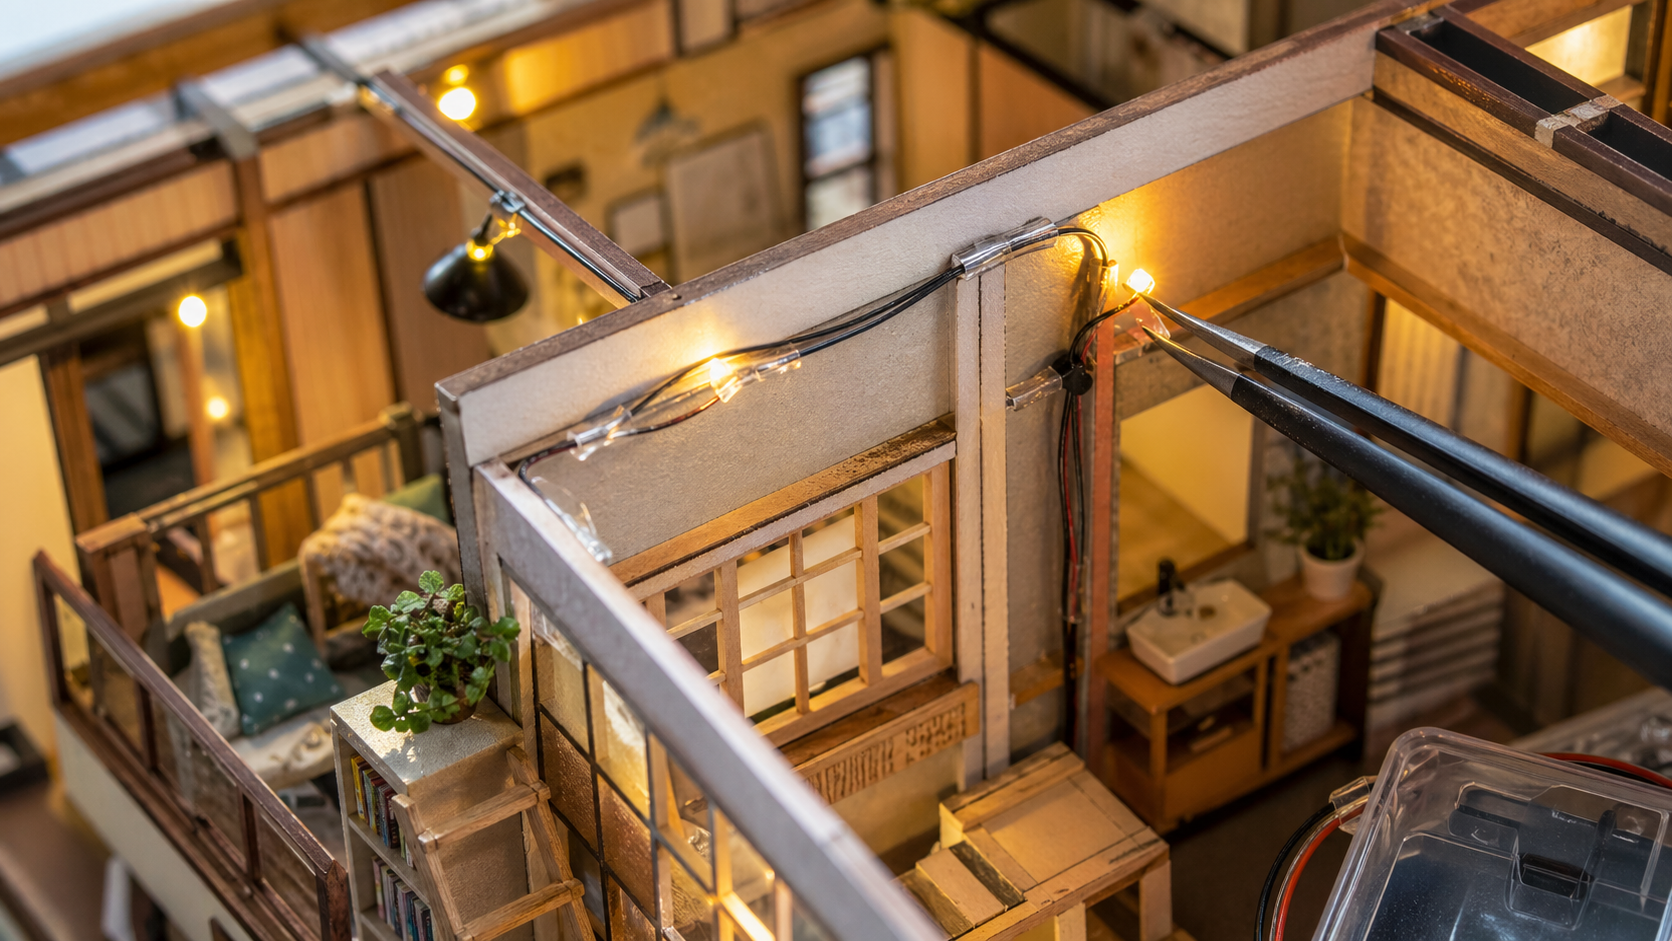
LED installation is the step where most beginners either do it too late or in the wrong location — because most instruction manuals bury the wiring diagram in a small corner illustration and don’t explain when to route the wires before walls close in around them.
The general sequence that works:
- Before the roof goes on — route the LED string through any designated wire channels or gaps in the walls. Do this before final roof assembly, not after. Once the roof panel is glued, access becomes difficult.
- Test before you glue — insert the batteries and confirm the lights work before closing anything in. A non-working LED that’s already trapped inside a finished kit requires partial disassembly.
- Don’t let glue touch the wire or connection points. In our Nookcraft manuals, you’ll usually see the wire routing explicitly called out around Step 14 or 15—right before you attach the ceiling panel in Step 16. A common issue we see in customer emails is LED failure three days after finishing. When they send photos, 90% of the time it’s because liquid glue seeped into the exposed copper wire twist at the connection joint, corroding it over time. Always leave at least a 5mm clearance of bare wire away from any glue applications.
- Battery box placement — route it to a position where it will be accessible from the back or bottom of the finished piece, so you can change batteries later without disturbing the display.
Step 5 — Adding Interior Details and Paper Components
This is the most satisfying stage and also where the most small mistakes happen.
- Paper components — the wallpaper strips, floor tiles, and printed decorative sheets — behave differently from wood. They curl when wet. They wrinkle if you use too much adhesive. Use a glue stick for paper-to-wood application, not liquid glue or super glue. Liquid adhesive soaks through thin paper and causes bubbling; super glue sets before you can adjust position. A glue stick gives you 10–15 seconds of repositioning time.
- For fabric pieces — curtain swatches, upholstery details — tweezers are essential. Apply a small dot of liquid glue to the receiving surface, not to the fabric itself, then use tweezers to place and press.
- Wire details (lamp bases, railing elements) usually need to be shaped before attaching. The instruction illustration will show the finished angle. Before you bend, hold the wire against the diagram to confirm the length and curve. Bend once slowly; thin wire doesn’t tolerate repeated flexing.
Step 6 — Final Assembly and Display

Before gluing the last structural piece — usually a roof panel or a back wall — do what I call the one-minute test. Set the near-complete kit on a shelf, step away, come back after 60 seconds, and look at it.
If your reaction is “yes, that’s right” — you’re done. If something reads as off, this is the moment to adjust before it’s permanent.
For display: a Nookcraft miniature house kit looks best at eye level or slightly below, where the interior scene is visible from the front and the LED lighting is visible at depth. On a bookshelf between actual books creates the most grounded visual effect — the real books provide scale contrast that makes the miniature scene read as intentional, not incidental.
The LED will do a lot of the work in dim light. Try switching the ambient room lighting low while the kit’s LED is on. That’s the display condition the scene was designed for.
Find your kit and start building →
When Something Goes Wrong — How to Fix the Most Common Mistakes
The honest fact about miniature kits: every builder, at some point, glues something at the wrong angle or attaches the wrong piece. It’s not a sign you’ve failed — it’s a sign you’re doing it for real.
The glue dried before a piece was fully attached — there’s a gap. For gaps under 1mm: a thin layer of fresh glue on both surfaces, pressed together and held for 60 seconds, will usually close it. The gap will also visually disappear once LED lighting is on — shadows fill narrow gaps in a finished scene.
A wall is attached at a slight angle. If the glue is still tacky (within 2–3 minutes), apply gentle pressure in the correcting direction while holding the base stable. If it’s fully set, score the joint carefully with a craft knife, remove the piece, clean both surfaces, and re-glue.
A wrong piece was attached. Score the joint, not the piece. Work a thin craft knife blade into the join seam with gentle rocking pressure. Most basswood joints can be separated without breaking the pieces if you go slowly. Clean off the old glue with a damp cotton swab before re-attaching.
The LED won’t light after completion. Check the battery orientation first. Then check whether any wire has been pinched by a wall join — run your finger along the wire path and feel for tension. If the wire tests fine and the battery is good, the connection point may need a gentle clean with a dry cotton swab.
If you’re stuck at a specific step, we answer build questions directly. Email us with a photo of where you are — we’ll tell you exactly how to fix it.
How Long Does It Really Take? (Honest Time Breakdown)
Our kits are labeled with a total hands-on time. Here’s what that number actually means.
A kit labeled “approximately 6–8 hours” means 6 to 8 hours of active work with your hands on the pieces. It does not mean 6 hours of sitting at the table — waiting for glue to dry is part of the process, and those waits don’t count toward the number.
The recommendation we give every first-time builder: split the build across two sessions, not one.
- Session 1 (3–4 hours): structural assembly — floor, walls, major furniture forms, LED routing.
- Session 2 (3–4 hours): interior detailing, paper components, final assembly, display.
Building in two sessions gives joints from Session 1 time to fully cure before you add weight and detail on top of them. It also means you come back to Session 2 with fresh eyes — which is when you catch the things that would have looked fine at hour six but obvious the next morning.
The break between sessions is not wasted time. It’s part of the process.
Frequently Asked Questions (FAQs)
What should I do if a wooden piece breaks during assembly?
A quick-drying PVA craft glue or wood glue works best for structural basswood pieces. For paper components like wallpaper, use a standard glue stick to prevent wrinkling. Avoid super glue (cyanoacrylate) as it dries too fast for repositioning and can leave a white residue on clear acrylic pieces.
Do DIY miniature house kits include batteries?
Due to US shipping regulations, most miniature house kits sold online do not include batteries in the box. You will typically need to purchase standard CR2032 button cells or AAA batteries locally, depending on the kit’s specific battery box. Check the product description before starting your build.
Are miniature house building kits suitable for beginners?
Yes, provided you choose the right kit. First-time builders should start with single-room scenes or book nooks (under 200 pieces) that include full-color English instructions. Multi-story dollhouses are better saved for your second or third project.
What should I do if a wooden piece breaks during assembly?
Don’t panic. If a basswood piece snaps, apply a tiny drop of wood glue to the break, press it together firmly, and let it cure for 10 minutes. If the break is visible on the finished piece, a touch of matching marker or a strategically placed miniature plant can easily hide the seam.
Ready to Build? Find Your First Kit
The kits on our beginner shelf are selected specifically for first-time builders: under 200 laser-cut basswood pieces, full-color English photo instructions from the builder’s angle, LED lights included, and a realistic time label so you know what afternoon you’re committing.
Browse beginner miniature house kits →
If you’re not sure which kit to start with, our beginner’s guide walks through how to choose by scene, build time, and difficulty — so your first kit is one you’ll actually finish.
About this article Written by Ellie Nakamura, Founder of Nookcraft. Content is based on hands-on kit builds, instruction manual design experience, and build questions collected from our customers. Where conclusions are based on personal observation rather than third-party testing, this is noted in the text. Last reviewed: April 2026